A portfolio is rarely just photos. Some work deserves a page of its own, some is a single image, and some is simply everything you’ve tagged “street”. Gallery Z lets you put all three into one gallery, filter them with one row of buttons, and link to the page already filtered. This tutorial builds that, step by step.
What we’re building
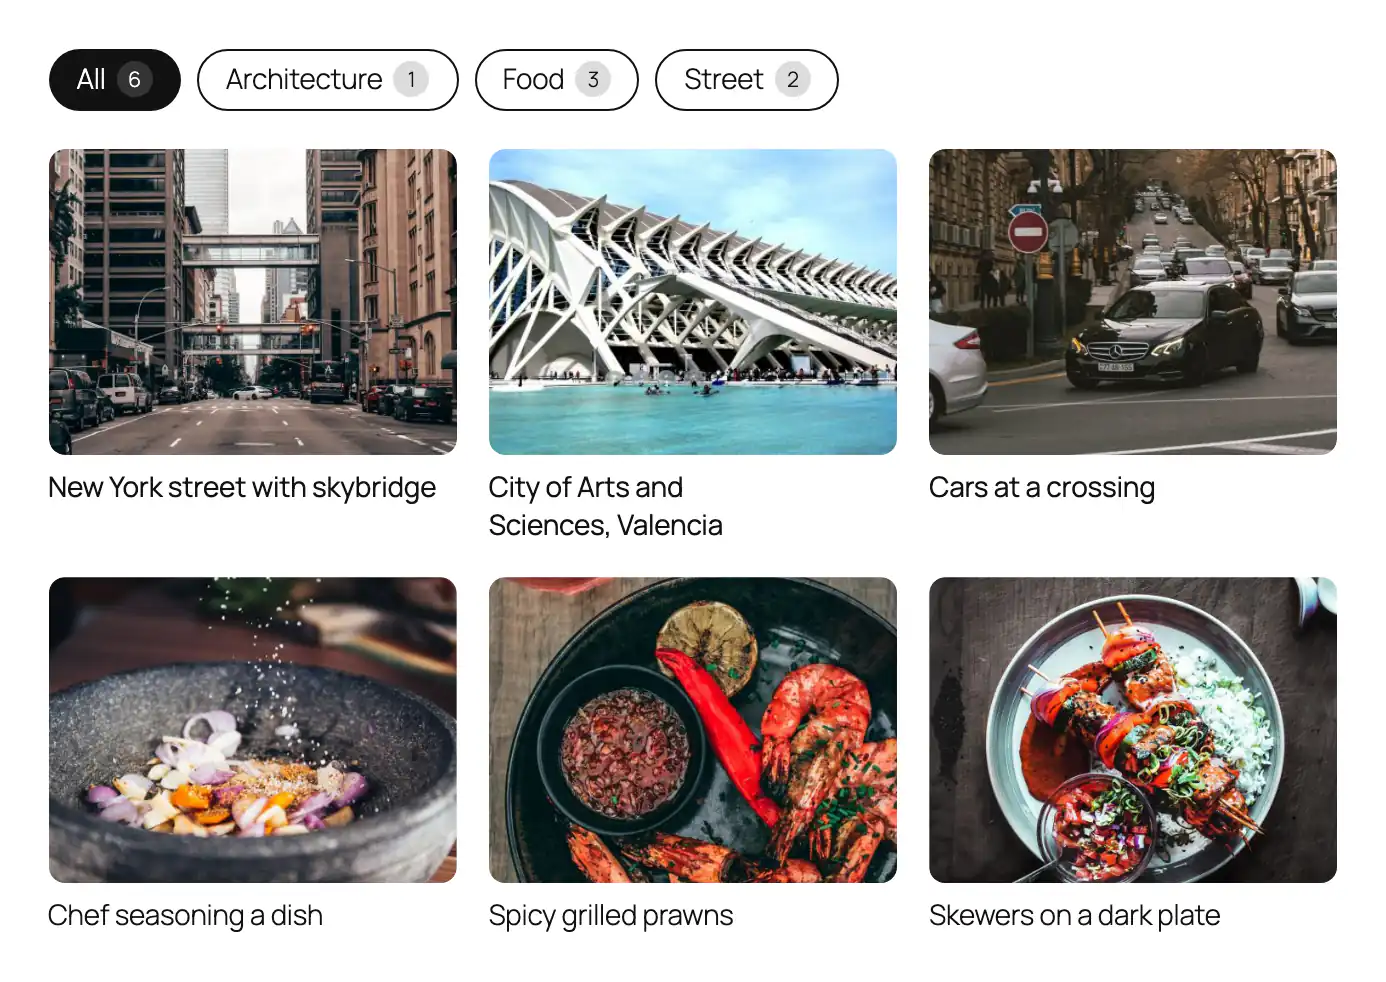
One page with a filter and a gallery that holds:
- Project posts – each shown with its featured image and title, and linking to the post.
- Hand-picked images – photos you chose and ordered yourself.
- A Media Library query – every image in a category, so new uploads appear without editing the page.
The glue is one taxonomy: Gallery Categories. It belongs to images, posts and pages alike, so a post and a photo can both be “Street”, and one filter button finds both.
1. Set up the categories
Create the categories you want to filter by – for a photographer maybe Architecture, Street, Portraits and Food. You can do that under Media → Gallery Categories, or on the fly while tagging, as below. Categories can be nested, and their order in the filter is set in the filter block later, so don’t worry about it now.
Then tag your content:
- Posts: open a project post, and tick its categories in the Gallery Categories panel of the sidebar. Give it a featured image – that is what the gallery shows.
- Images in the Media Library: in the list view, select several images and use the bulk action Add to gallery category…. The attachment details show the categories as a checklist too.
- Images in a gallery: select one, or shift-click several, and use the tag button in the block toolbar. Each category is a checkbox, and new ones can be created right there. It saves straight to the images in the Media Library.
2. Add a filter and a gallery
Open the command palette (Cmd+K or Ctrl+K) and run Add filterable gallery. It inserts a Gallery Filter and a Filterable Gallery that are already connected. If you add them from the inserter instead, connect them yourself: give the gallery a Gallery ID in its Filtering panel, and pick that gallery in the filter’s settings. A filter without a gallery filters every gallery on the page, which is handy when a page has several.
The patterns are another shortcut: Filterable portfolio (posts) in the inserter’s Galleries category gives you a finished posts portfolio to adapt.
3. Fill the gallery
An empty gallery offers three ways to add content, and you can use all of them in the same gallery:
- Posts or pages. This inserts a Gallery Posts block: the regular Query Loop, set up with a Post Template, a Post Featured Image and a Post Title. Every Query Loop setting works – post type, order, number of posts, and the taxonomy filter, where you can limit it to certain Gallery Categories.
- Add images. Pick images from the Media Library; they become ordinary Image blocks in the order you choose.
- A media query. The Gallery Media Query block shows Media Library images by Gallery Category: choose the categories, how many (24 by default), the order – date, title or random – the image size, what they link to, and whether they show captions.
On the page, the posts, the images and the query results don’t stay in separate boxes. The groups dissolve into one grid, so a post can sit next to a photo in the same row. The toolbar’s Sort menu reorders the hand-picked images – newest first, by title, by file name, shuffled – and leaves the posts and queries where they are.
In the editor, the toolbar’s Edit / Preview switch helps here. Edit shows every item as a plain tile with a badge of its categories – untagged ones say “No category” in yellow – so you can spot what the filter would miss. Preview shows the real layout.
4. Choose the look
For a portfolio of mixed content, a grid keeps things tidy: set the aspect ratio to 4:3 and every tile has the same shape, whether it holds a post or a photo. Masonry works too if you’d rather keep each photo’s shape. Columns can be set per device, and the default – three on desktop, two on tablets, one on phones – is a good start.
Captions apply to both kinds of items: an image shows its caption, a post its title. Put them below the photos for a portfolio people read, or on hover for a cleaner grid. Posts link to their page; for the images, pick a click behavior – a lightbox is the usual choice.
5. Set up the filter
Select the filter block. In its settings:
- Categories: which ones get a button, and in which order. Leave it empty to show all of them.
- “All” button: on by default; rename it if “All work” reads better.
- Counts: the number of items per category, inline, as a badge or as a superscript.
- Hide empty: on by default, so categories with nothing in this gallery don’t get a button.
- Multi-select: lets visitors combine categories.
For the look, the Presets panel sets a complete style in one click – compact chips, tabs, a segmented control, soft tags, minimal links, and more. On phones, Pills + dropdown on mobile keeps a long list of categories from wrapping into several rows.
6. Link to a filtered view
This is the part that makes a filterable portfolio useful beyond the page itself. In the filter’s settings, set a URL parameter – say work. From then on:
- Clicking “Street” changes the address to
/portfolio/?work=street, without reloading. The link can be copied and shared. - Opening that link shows the page with Street already selected. The active button is rendered on the server, and the gallery applies the selection as soon as its script starts – no click needed.
- With multi-select on, several categories are a comma-separated list:
?work=street,food. - A link to a category that doesn’t exist, or isn’t in this filter, shows everything instead of nothing.
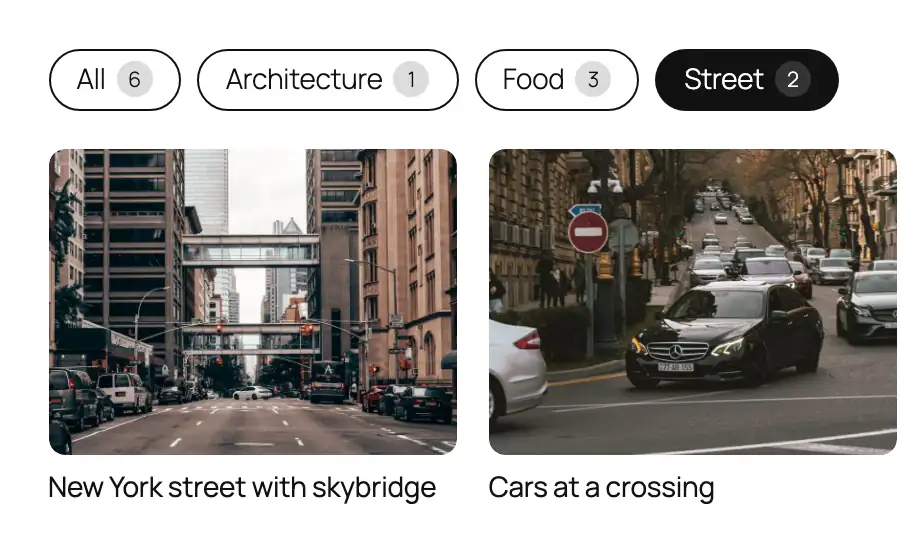
?work=street: Street is selected as the page loads.Now you can link to parts of your portfolio from anywhere: a menu item “Street photography” pointing to ?work=street, a newsletter, a post that mentions your food work. It’s one page to maintain, with as many entry points as you have categories.
Bonus: an archive per category
Gallery Categories are a public taxonomy, so each one also has an archive at /gallery-category/street/. On block themes, Gallery Z provides a template for it: the category’s title and description, and one masonry gallery with a lightbox that holds the category’s images and its posts. You can edit it under Appearance → Editor → Templates, and a theme’s own template for the taxonomy takes precedence. For search engines and sharing, an archive page with its own title can be the better link; for a visitor who’s already on your portfolio, the filtered link keeps them there.
Checklist
- Every project post has a featured image and at least one Gallery Category.
- The gallery shows no “No category” badges in Edit mode.
- The filter and gallery are connected, or the filter targets the whole page.
- The URL parameter is set, and a link with it opens the right selection.
- On a phone, the filter fits – or turns into a dropdown.
Every block and option used here is described in the docs: Blocks & options and Categories & Media Library.